In Linux Google App Engine in Eclipse
STEP 1
First you have to install Eclipse IDE for that . Its free so anyone can download. Here is the link.
Eclipse IDE
STEP 2
Now install Java SDK. Here is the link..
Java SDK
STEP 3
Now install the Google Eclipse App Engine plugin.
Ref Link : http://code.google.com/eclipse/docs/install-from-zip.html
STEP 4
Install the Google web toolkit plugin.
Ref Link : http://code.google.com/webtoolkit/gettingstarted.html
- There is easiest way to follow Step 3 and 4. Click Help --> Eclipse Market Place
- Type Google App Engine
- install the plugin
STEP 5
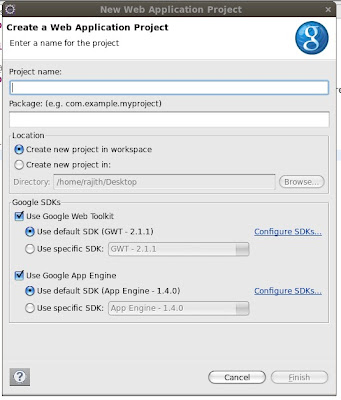
Create Web Application.
File --> New --> Web application or Simply click the g icon (blue background).

- Enter the Project Name as GuestBook and Package name as guestbook.
- Make sure Google Web Toolkit checkbox and Google App Engine check box is selected.
- Click Finish.
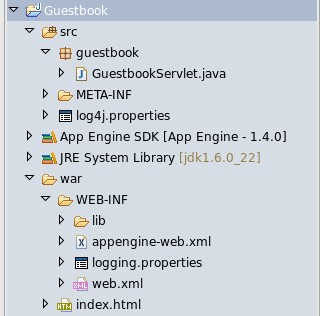
Now it will create the project structure like this.

There are some files that Eclipse automatically created.
- src/GuestBookServlet.java
- war/WEB-INF/web.xml
- war/WEB-INF/appengine-web.xml
STEP 7
After that debug your app like this. Click Run ---> Debug as ---> Web Application
now it will create a server 8888 port so you can access it by browsing http://localhost:8888/
STEP 8
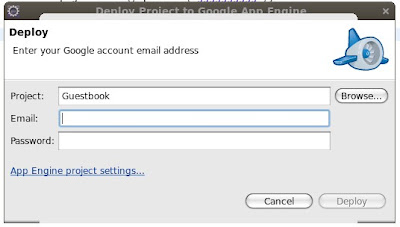
To deploy your app to Google App Engine right click the app select Google --> Deploy to App Engine

Before deploy get application ID from http://code.google.com/appengine/ .
So, These are the major steps that you want to follow to create and deploy Java App Engine application to Google App Engine.

No comments:
Post a Comment