You can emulate US for a passion for acquiring new knowledge, and disseminate it to as many as you can.
You have great potential. Work with dedication and get ready for the challenges of your career!!!
Dedicated to- Our students, who are bringing glory to us and our Faculty.
The XAMPP stack is an open-source Apache distribution of a PHP development environment consisting of cross-platform software (X): Apache (A), MariaDB (M), PHP (P) and Perl (P).
Developers use the platform as a local host for testing software and webpages before transferring the data to a remote online server.
In this guide, you will find simple instructions on how to install XAMPP on Ubuntu 18.04. We also dive into verifying a successful installation and uninstalling the XAMPP package.
Android Studio is a full-featured cross-platform IDE that allows you to create applications for any Android device. It is built on JetBrains' IntelliJ IDEA and comes with everything you need to get started with Android programming.
Gradle powers the Android Studio build system, allowing you to generate numerous build versions for different devices from a single project.
Prerequisites
You’ll need to be logged in as a user with sudo access to be able to install packages on your Ubuntu system.
Installing Java OpenJDK
Android Studio requires OpenJDK version 8 or above to be installed to your system
$ sudo apt update
Install the OpenJDK 8 package by typing
$ sudo apt install openjdk-8-jdk
Verify the installation by typing the following command
$ java -version
The output should look something like this below:
openjdk version "1.8.0_191"
OpenJDK Runtime Environment (build 1.8.0_191-8u191-b12-2ubuntu0.18.04.1-b12)
OpenJDK 64-Bit Server VM (build 25.191-b12, mixed mode)
Installing Android Studio
At the time of writing this article, the latest stable version of Android Studio is version 3.3.1.0 and above. The easiest way is to install Android Studio on Ubuntu 20.04 is by using the snappy packaging system.
To download and install the Android Studio snap package, open your terminal using the Ctrl+Alt+T keyboard shortcut and type:
$sudo snap install android-studio --classic
Starting Android Studio
You can start Android Studio either by typing android-studio in your terminal or by clicking on the Android Studio icon (Activities -> Android Studio).
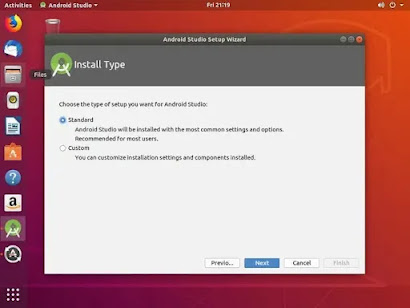
When you start Android Studio for the first time, a window like the following will appear asking you to import Android Studio settings from a previous installation:
Installing Eclipse IDE on Ubuntu 20.04
The most popular Java integrated development environment is Eclipse (IDE). It may be extended with plugins and used to create in other programming languages such as C++, JavaScript, and PHP.
Prerequisites
Before continuing with this tutorial, make sure you are logged in as a user with sudo privileges .
To install Eclipse on your Ubuntu system, follow these steps:
1. Eclipse is a Java-based application and it requires a Java runtime environment (JRE) to be installed in order to run. Install the default OpenJDK package with:
$ sudo apt install default-jre
2. Download and install the Eclipse snap package on your system, by typing:
$ sudo snap install --classic eclipse
When you start Eclipse for the first time, a window like the following will appear asking you to select a Workspace directory:
Starting Eclipse
Now that Eclipse is installed on your Ubuntu system you can start it by clicking on the Eclipse icon (Activities -> Eclipse):
Installing Netbeans on Ubuntu 20.04
Netbeans is a full-featured cross-platform IDE for developing applications in Java, PHP, and a variety of other languages.
It includes debugging support, embedded Git control, key build automation tools like Maven, Ant, and Gradle, syntax highlighting, code generators, code templates, code refactoring, and extensive navigation features.
Netbeans may be extended with plugins and offers well-documented APIs. It may also be used for programming in other languages like as C/C++, Groovy, Javadoc, JavaScript, and others.
Prerequisites or Requirements
You’ll need to be logged in as a user with sudo access to be able to install packages on your Ubuntu system.
Installing Java OpenJDK through Terminal (Ctrl+ALt+T)
Java is distributed in three different editions, Standard Edition (SE), Enterprise Edition (EE), and Micro Edition (ME). There are two different Java packages in Ubuntu repositories, Java Runtime Environment (JRE), and the Java Development Kit (JDK). If you only want to run Java programs, then you need JRE, which contains only the Java Runtime Environment. Java developer should install JDK, which also includes the development/debugging tools and libraries. Netbeans requires Java version 8 or above to be installed to your system.
To update all the packages before and after installation of packages. Like in Linux platforms the setup files like in Windows .exe are called as packages in linux or ubuntu.
$ sudo apt update
Install the OpenJDK 8 package by typing:
$ sudo apt install openjdk-8-jdk
Verify the installation by typing the following command which will print the Java version:
$ java -version
The output should look something exactly like this:
openjdk version "1.8.0_191"
OpenJDK Runtime Environment (build 1.8.0_191-8u191-b12-2ubuntu0.18.04.1-b12)
OpenJDK 64-Bit Server VM (build 25.191-b12, mixed mode)
Installing Netbeans IDE
At the time of writing this article, the latest stable version of Netbeans is version 10.0. The easiest way is to install Netbeans on Ubuntu 18.04 is by using the snappy packaging system.
To download and install the Netbeans snap package, open your terminal using the Ctrl+Alt+T keyboard shortcut and type:
$ sudo snap install netbeans --classic
The process may take some time depending on your connection speed and the configuration of the system. On successful installation, you will see the following output like this below:
netbeans 10.0 from 'apache-netbeans' installed
Starting Netbeans IDE
Now that Netbeans is installed on your Ubuntu system you can start it typing netbeans in your terminal or by clicking on the Netbeans icon (Activities -> Netbeans):


No comments:
Post a Comment