(Knoppix)
{ Getting Started }
| Section 0. Background Information |
- Knoppix is a GNU/Linux distribution that boots and runs completely from CD or DVD and can be used to read and write Windows and other partitions (among other clever tricks)
- The Knoppix CD and DVD include recent Linux software and desktop environments.
- The DVD includes programs such as OpenOffice.org, Abiword, The Gimp, Konqueror, Mozilla, Apache, PHP, MySQL and hundreds of other quality open source programs.
| Section 1. Downloading Knoppix |
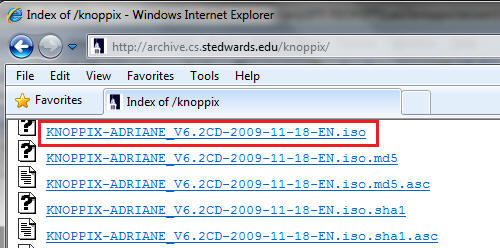
- Go To http://archive.cs.stedwards.edu/knoppix/
- Select a file that ends with ".iso"
- Note: EN stands for English
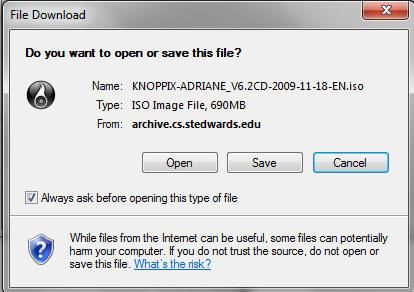
- Saving the ISO
- Command: Click Save
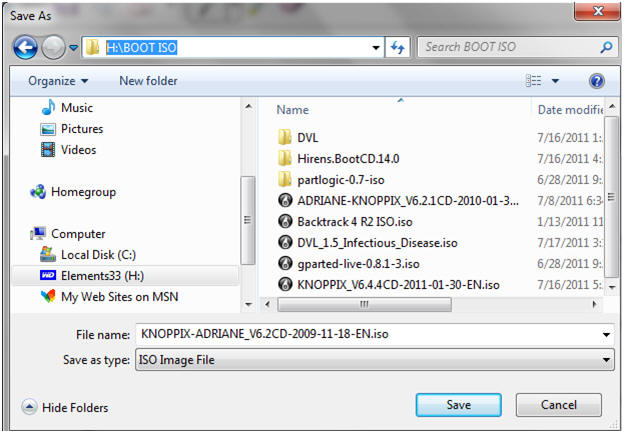
- Saving ISO to a location
- Instruction: It's up to you were you want to save the file. In my case, I will save the ISO to H:\BOOT ISO
| Section 2. Configure the Windows Virtual Machine to boot up knoppix |
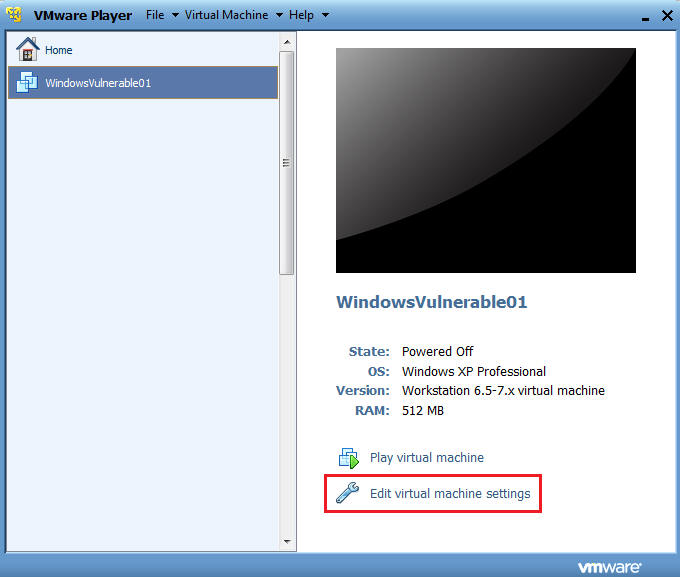
- Edit the WindowsVulnerable01 virtual machine. (See Below)
- Note: For those of you that don't have access to class material, this can be Windows XP, 2000, 2003 and 7.
- Configure Windows to boot off Knoppix
- Instructions:
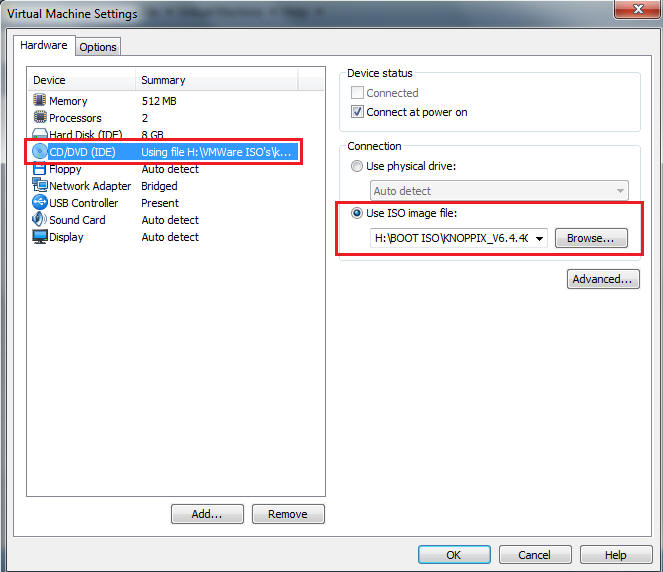
- Select CD/DVD (IDE)
- Select the Use ISO image file
- Browse to where you saved the knoppix iso.
- Note: In my case, I save it in the following location:
- H:\BOOT ISO\KNOPPIX_V6.4.4CD-2011-01-30-EN.iso
- Configure Knoppix to use Linux VMware setting.
- Instructions:
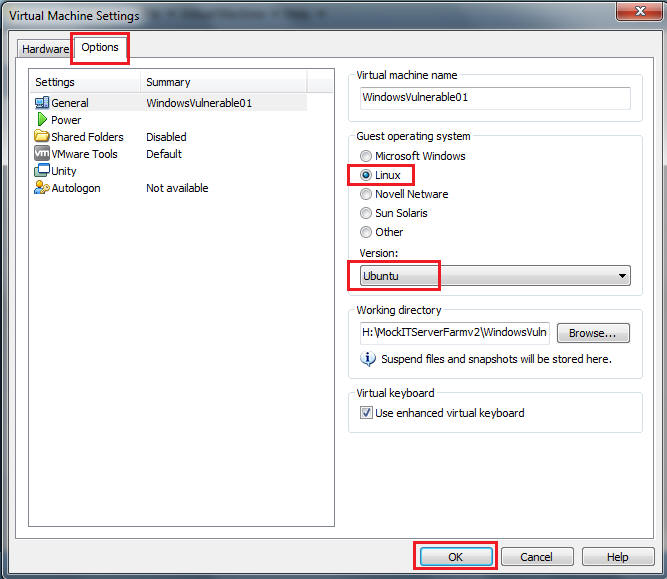
- Select the Options tab
- Select Linux for the Guest operating system
- Select Ubuntu for the Guest operating system version.
- Select OK.
- Play the Virtual Machine
- Select Play Virtual Machine

| Section 3. Start Up Knoppix |
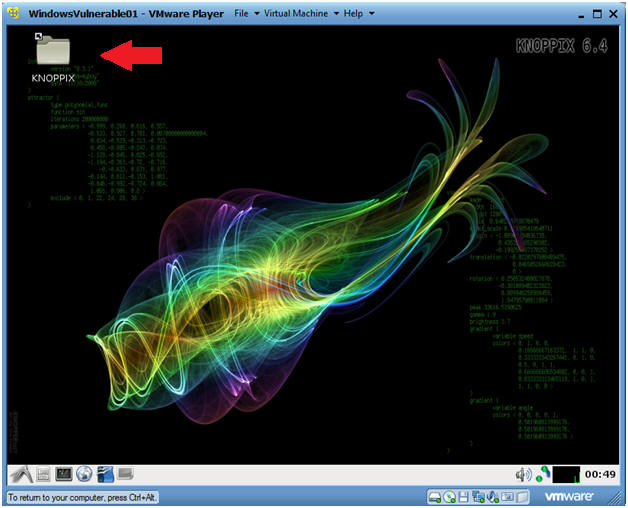
- Knoppix Start
- Instructions:
- Let knoppix boot it, it will takes 30 seconds to 1 minute.
- Click on the KNOPPIX Folder
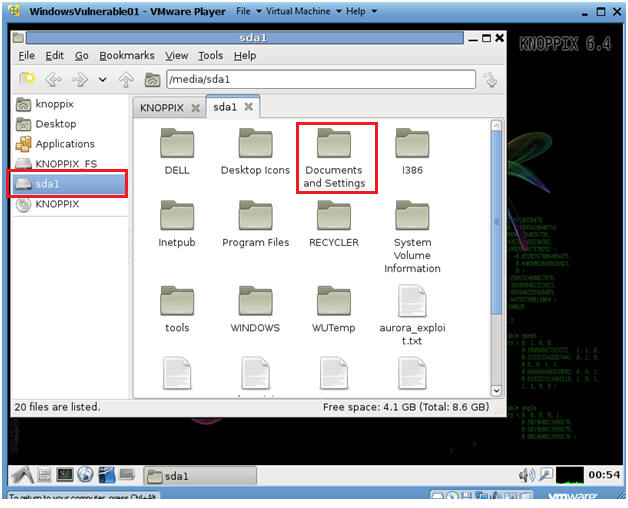
- Mounting your hard drive
- Instructions:
- Click on sda1 (This is your hard drive)
- Click on Documents and Settings
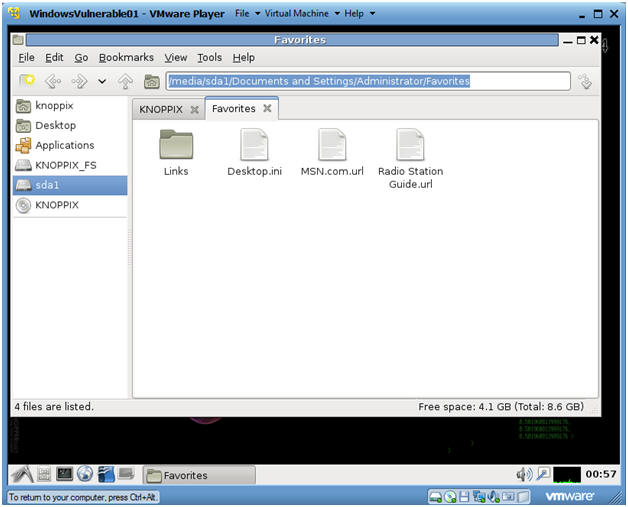
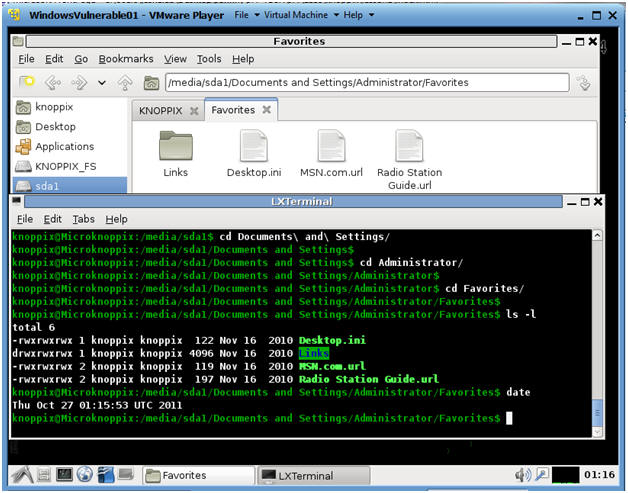
- Navigate to Favorites
- Instructions:
- Click on Administrator
- Click on Favorite
| Section 4. Start Up Terminal Window |
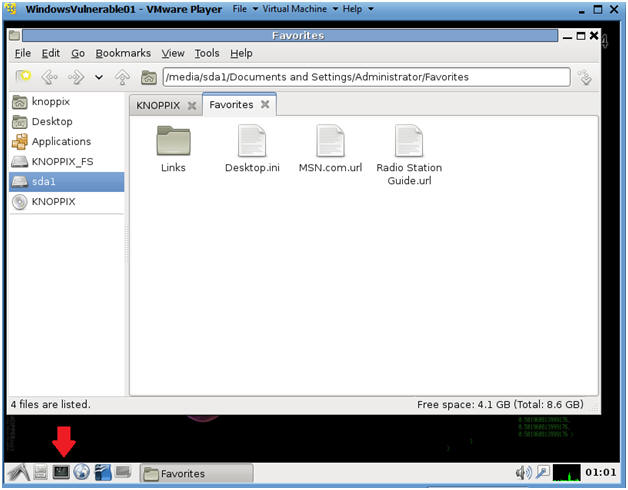
- Start up a Terminal Windows
- Command: Click on the Black Terminal Window (See Below)
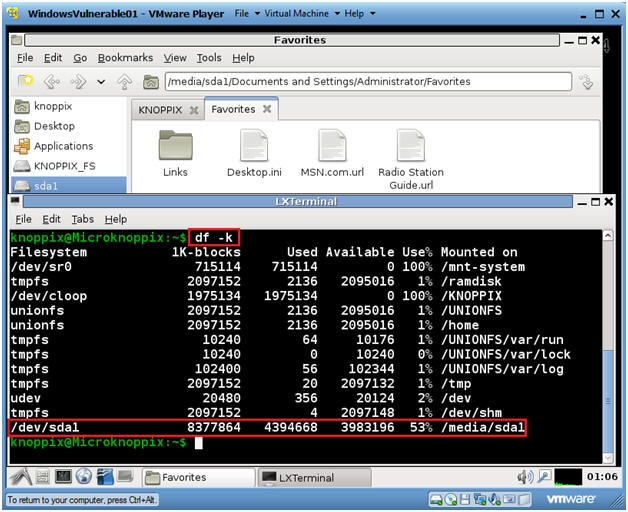
- View the file system structure using Knoppix
- Command: df -k (See Below)
- Note:
- /dev/sda1 is your hard drive
- /media/sda1 is the mount point of your hard drive.
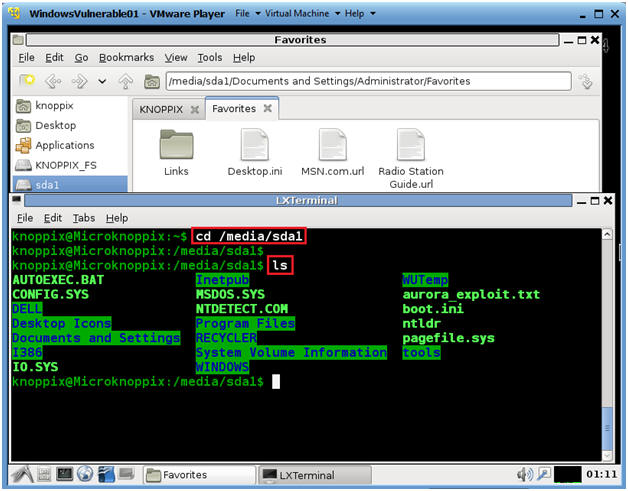
- Navigate to your hard drive
- Command: cd /media/sda (See Below)
- Command: ls
- Navigate to Favorites
- Instructions:
- cd Documents\ and\ Settings
- Press the TAB key after typing "D"
- cd Administrator
- Press the TAB key after typing "A"
- cd Favorites
- Press the TAB key after typing "A"
- ls -l
- date
- Proof of Lab: Do a screen print, cut in paste into a word document, and upload to Moodle.
- Cut and Paste a screen shot found in Section 4, Step 4 in a word and upload to Moodle.
|
|

No comments:
Post a Comment